


When it comes to automotive maintenance, construction projects, or simply lifting heavy objects, having the right tools is essential. Among the most versatile tools in this regard are jacks. Jacks are mechanical devices designed to lift heavy loads vertically, providing stability and convenience in various applications. In this comprehensive guide, we will explore six different types of jacks and delve into the proper techniques for using them safely and effectively.

Table of Contents
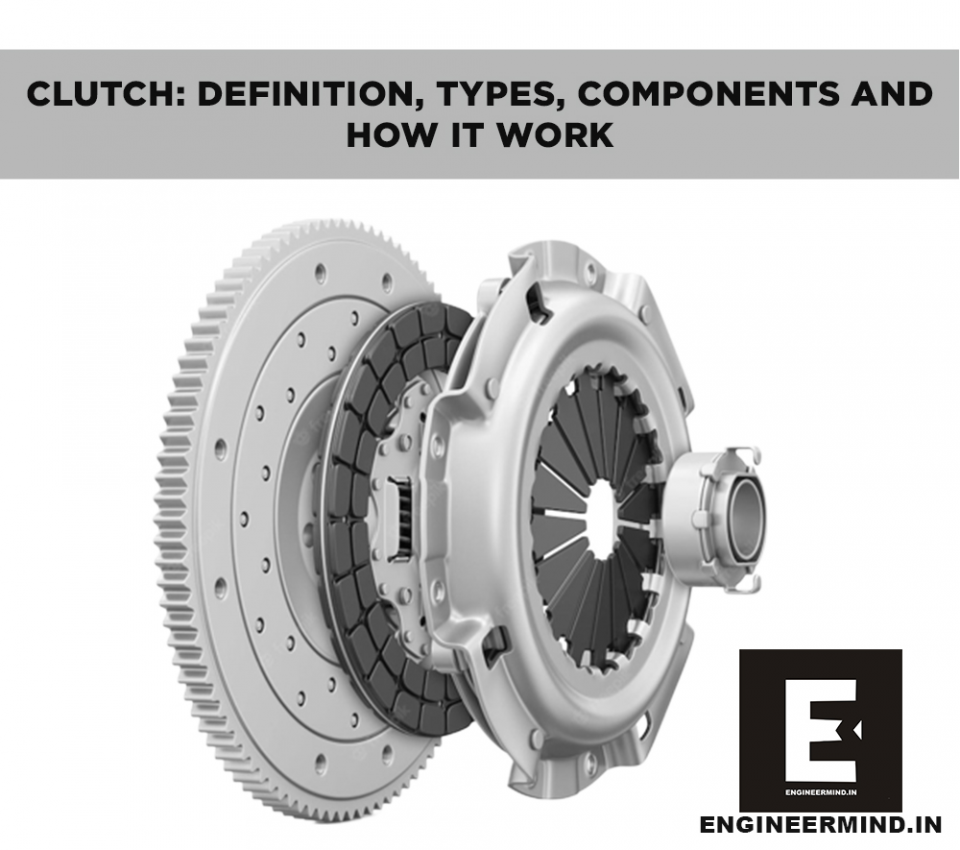
A car jack is a device used to lift a vehicle off the ground for the purpose of maintenance or repair. The most common type is a mechanical jack that uses a screw thread for lifting and lowering. It is typically used in conjunction with jack stands to support the vehicle once it has been lifted.
Types of jacks
- Scissors Jack
- Floor Jack Or Trolley Jack
- High Lift Jack
- Hydraulic Bottle Jack
- Exhaust Air Jack
- Pneumatic Jack
Scissors jack

A hand crank is used to lift a vehicle using a scissor jack once it has been positioned correctly. Since their capacity is normally rated at one or two tones, scissor jacks are suitable for use with lightweight vehicles due to their versatility. In addition, they have a manageable lift height, which can range anywhere from 15 to 30 inches depending on the model.
The primary benefit of using a scissor jack is that it is much safer than other types of jacks, such as high-lift and agricultural jacks, which require more care and expertise to use. In comparison to floor jacks, scissor jacks are not only more cost-effective but also lighter and more portable. Because of this, they are an excellent option to consider if you require a portable jack that can be relocated with relative ease.
- How to use it?
- As was just discussed, determining the location of the car’s safe lift point is of the utmost importance. Due to the fact that scissor jacks are utilized at particular spots on the chassis, it is much more important that this be done. The base plates have an excellent degree of compatibility with the grooves that are located on the undercarriage of the vehicle.
- After positioning the jack in the appropriate location, slip the handle into place and turn it in the “R” direction marked on the device. Keep in mind that you need to move slowly and steadily in order to get an even and aligned lift.
- When the automobile has been raised all the way, it is a good practice to remove the handle from the door. It lessens the likelihood of falling over or being knocked down.
- Rotate the handle in the “L” direction until you reach the ground level. This will return the vehicle to its starting position.
Floor jack

You’ve probably seen a floor jack in movies and TV shows about cars when a wheeled gadget is wheeled into place. Because of its extended arms, it may be easily relocated. With the lengthy handle, it’s simple to raise and lower the device once it’s been positioned beneath the car.
The primary distinction between a floor jack and a trolley jack is their respective lifting capacities. The lowest-riding vehicles, such as sports cars and luxury sedans, are the best candidates for use with trolley jacks. However, there could be subtle changes in the build quality and internal mechanisms. Whereas a trolley jack is made of steel and has a releasing spring, a floor jack is more compact and lightweight.
- How to use it?
- One of the most useful tools you may have in the garage is a jack with wheels since it makes lifting the cars so much easier. Keep your back straight and stop bending over.
- One must first identify secure lifting points before putting the jack in position. These are often located in the front or rear of the vehicle, and they are the most robust component of the chassis. However, you can check the owner’s manual or consult a reliable service centre to find the specific spot.
- Place the jack under the spot you can safely raise it from once you’ve identified it. Check that the bottom of the frame is flush with the sill.
- Third, with the base plate still far from the car, pump the adjustment arm until it touches the vehicle. Accurately align so that the load is distributed uniformly.
- Fourth, keep repeating step three until the vehicle is high enough off the ground.
- To return the vehicle, step five is to twist the height-adjustment arm until it is at its highest point. The car will gently descend to the earth as the air released from the pump is activated.
High lift jack
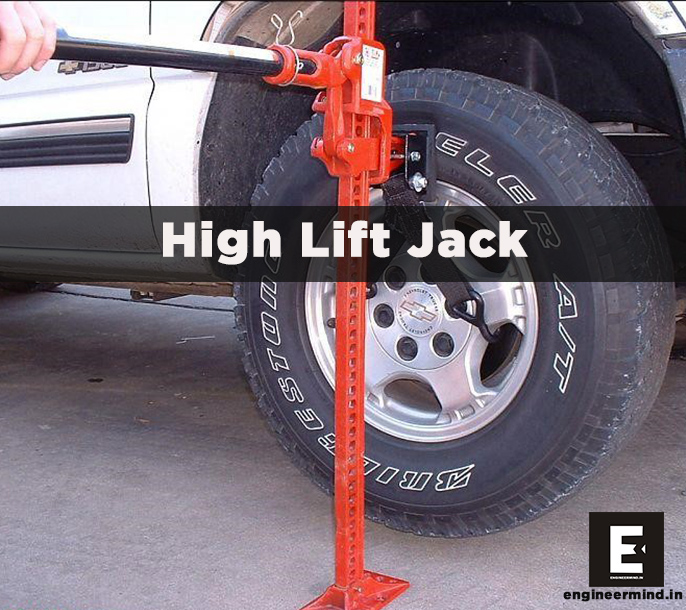
The High Lift Jack is not universally useful or suitable for usage with all vehicles. If you’re an off-roader or a trailer owner, you’ll only ever need the full lift capacity once. Not everyone has one in their garage.
Be very careful when using a high lift jack because of its small footplate. Use extreme caution when operating the high lift jack, or better yet, have a professional do it. Simply put, if you are not an off-roader, you have no need for a high-lift automobile jack.
Let’s get the difference between High lift and High Lift Jacks straight before we move on to using carjacks. Car jacks are not what the name “High lift” suggests; rather, it is a brand of high-lift jacks. There is no such thing as a “high-lift jack” that isn’t a High lift jack.
- How to use it?
Consider your goals before using your High lift. Lifting a corner or the whole belly? Is it flat? Where will you put the car jack? Consider these variables for secure work completion. Set the parking brake or chock the wheels before raising the vehicle.
High lifts must start with the handle parallel to the bar and the lever up to lift vehicles. Run your foot up the bar to start jacking without cycling the mechanism. The jack must be unloaded and the lever up for this. After the jack is in place, squeeze the top of the bar with only three fingers. Try not to wrap your thumb around the bar. As you lift the vehicle, the effort required increases, making this challenging. If the jack tilts, lower and reposition for a safer lift. Practice makes perfect.
Hold the jack by the bar and handle to lower the car. Using your foot, push the reverse lever down. Keep one hand on the bar with your elbow locked and grab the handle with the other to lower it. After the climbing pin clicks, elevate the handle. As the handle arcs up, the force will draw your arm up to the bar. As the handle rises, the leverage increases, so are careful on the slick ground and stay away from the handle.
Hydraulic bottle jack

Hydraulic bottle jacks are portable, user-friendly appliances that can raise big objects. These jacks are adaptable and accessible due to their tiny size, which fits them perfectly on a garage shelf or in a car trunk. Despite their little size, hydraulic bottle jacks are capable of lifting loads up to 20 tons, and 100 tons for industrial bottle jacks. This article focuses on the features and functionality that make a hydraulic bottle jack appropriate for various applications.
- How to use it?
- If possible, park your car level. The garages are great. If you can move your vehicle, select a level area and avoid traffic in an emergency. To prevent rollback while jacking, set your parking brake.
- If you’re lifting at the back, chock the front wheels; if you’re lifting at the front, chock the rear wheels. Rollback protection.
- Jack stands are needed if you want to access under your car or leave it up. Check your jack stands for flaws before use. Use jack stands for under-vehicle repair.
- Check your jack for damage and hydraulic oil leaks. Check the barrel’s back plug for tightness. Close the release valve. To ensure vehicle contact, clean the saddle (top of the lifting cylinder).
- Put the handle in the barrel’s side receptacle. Don’t leave it out!
- Give the jack some loads of pumps. Pump slowly. To test the release valve, slowly spin it anticlockwise to lower the cylinder. Turn the release valve using the handle’s notch. The jack’s front valve is towards the barrel’s bottom. Retighten the release valve.
- Locate your vehicle’s lift point. Check the owner’s manual for its location. Lift points are designed to withstand lift pressure without cracking. Lifting from specified lift points prevents vehicle damage.
- Check your workspace for people, debris, and anything that could damage you. Work safely.
- As near as possible, place your bottle jack under the lift point. A strong board under the jack will provide a stable, level platform if the ground is uneven or mushy.
- Insert the handle and push the jack until the saddle almost touches the vehicle. Now’s the moment to fine-tune the saddle’s alignment with the lift point.
- Pump the jack slowly until the vehicle is high enough to work safely. Even though good bottle jacks prevent over-extension, don’t lift your vehicle higher than necessary. Place your jack stands so they can support the vehicle.
- Remove the jack handle and carefully turn the release valve counter-clockwise using the notch at one end. This drains the cylinder, lowering the lifting column. Slowly lower the jack until it supports the vehicle. Check the stand before lowering the jack.
- Remove the jack stands and any tools.
- Check for anyone working on or near the car. After checking, slowly lower the vehicle to the ground.
Exhaust Air Jack
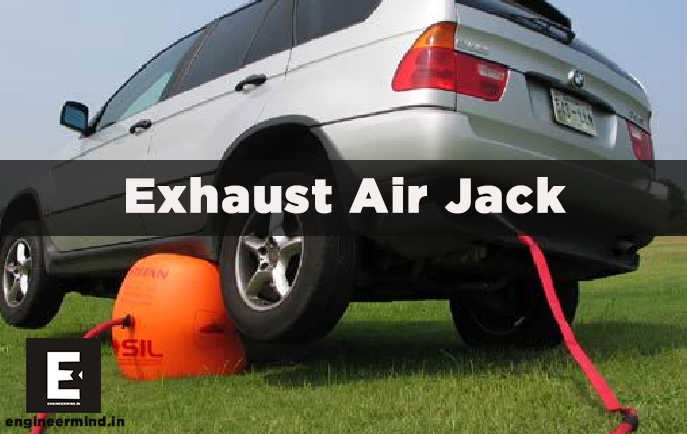
A car’s exhaust or an air compressor is used to inflate the jack, which then safely lifts the vehicle. Transport heavy vehicles with ease and speed. The exhaust air jack will quickly and easily get your car out of mud and ruts.
Standard components of a recovery kit for an exhaust jack include a puncture repair kit in case the jack is punctured, work gloves to keep your hands clean and protected, protective mats to shield the jack from sharp under-car body projections or sharp rocks and sticks on the surface, a bag to transport the jack and its components, an extension hose, an exhaust hose, and the exhaust jack itself.
A high-quality exhaust jack will be constructed with multiple layers for maximum strength. If you want to avoid the potential for harm to your vehicle that comes with using a high-lift jack, an exhaust jack is an excellent option. You can use an exhaust jack on the sand, dirt, soft, sloping ground, snow, and more.
- How to use it?
- Locate a suitable exhaust pipe: Park your vehicle on a level surface and identify the exhaust pipe, which is usually located at the rear of the vehicle. Ensure that there is enough clearance around the exhaust pipe.
- Unpack and prepare the exhaust air jack: Take the exhaust air jack out of its packaging and lay it on the ground. Make sure all the components are intact and in good condition. Check the instruction manual provided with the jack for specific setup instructions.
- Attach the exhaust hose: Connect one end of the exhaust hose to the exhaust pipe of your vehicle. Ensure a secure fit by tightening any clamps or fasteners that may be included with the jack.
- Position the air jack: Position the air jack underneath the lifting point of your vehicle. The lifting point is typically located near the wheels or the chassis. Refer to your vehicle’s manual for the exact lifting points. Ensure that the air jack is stable and properly aligned.
- Start the vehicle: Start your vehicle’s engine and let it run at idle. This will generate exhaust gases that will inflate the air jack.
- Inflate the air jack: As the engine runs, the exhaust gases will flow into the air jack through the attached hose, causing it to inflate. Keep an eye on the air jack’s pressure gauge to monitor the inflation process. Follow the manufacturer’s instructions for the recommended pressure level.
- Lift the vehicle: Once the air jack is fully inflated, it will lift your vehicle off the ground. Check that it is securely supporting the weight of the vehicle before proceeding further.
- Perform the desired task: With your vehicle lifted, you can perform tasks such as changing a tire or accessing the undercarriage for maintenance or repairs.
- Lower the vehicle: When you have finished your task, carefully lower the vehicle by turning off the engine. The exhaust gases will dissipate, and the air jack will gradually deflate. Make sure to remove the exhaust hose from the exhaust pipe.
- Store the exhaust air jack: After deflation, clean and dry the exhaust air jack before storing it in a safe and secure place, away from moisture and extreme temperatures.
Pneumatic Jack
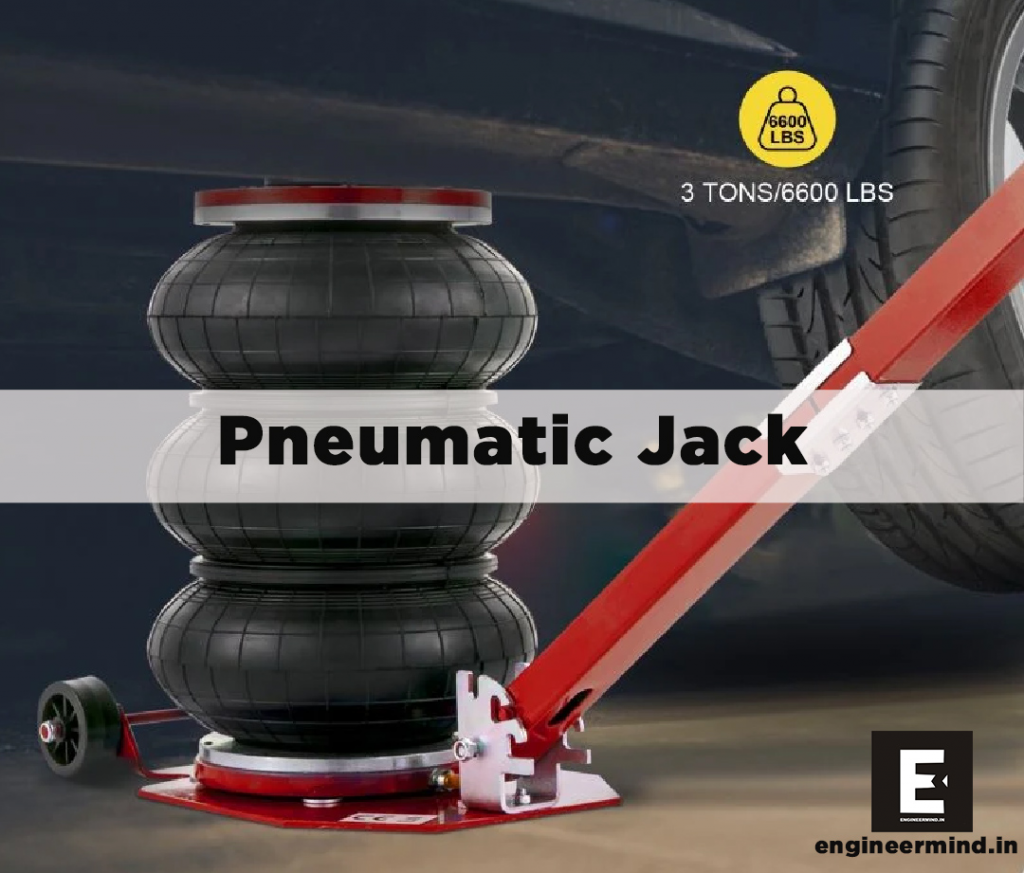
Pneumatic jacks are powered by compressed air and are used to easily move and lift heavy equipment and materials. With the help of compressed air, pneumatic power turns electric power into mechanical power. The compressed air transfers force so that heavy parts can be lifted, pushed, or moved.
In the trenchless industry, pneumatic jacks are used to lift heavy pipes and move them around while they are being installed. In other parts of the construction industry, pneumatic tools like jackhammers and jacking systems are also used. Pneumatic systems are easy to use and cost less because they mostly use regular air.
- How to use it?
- Set up the jack on a level and stable surface, making sure that the load to be lifted is centred over the jack’s base plate.
- Connect the jack to a compressed air supply using the appropriate fittings and hoses.
- Turn on the air supply and check the pressure gauge to ensure that the jack is receiving the correct amount of air pressure.
- Slowly release the lock valve to allow air to enter the cylinder and extend the piston rod. The load should begin to lift.
- Adjust the air pressure as needed to achieve the desired lift height.
- Once the load is at the desired height, lock the valve to prevent the jack from lowering.
- When finished, turn off the air supply and release the lock valve to lower the load. Be sure the load is stable before moving it.
- Disconnect the jack from the air supply and store it properly.

